Ellyn / November 8, 2021
A Client Event command allows a chat to trigger an event in the host website.
Adding a Client Event command node #
Step 1: #
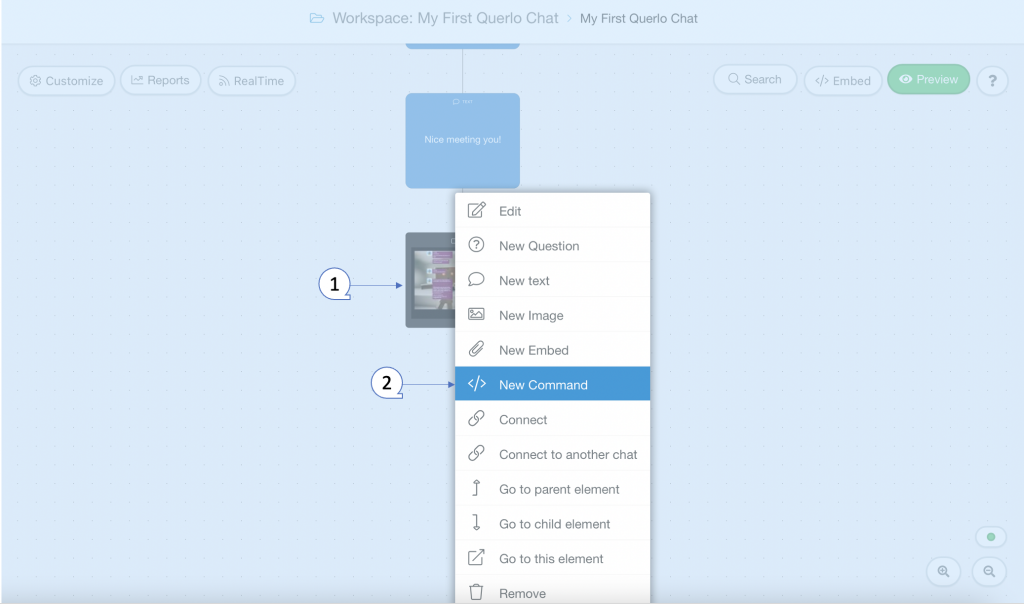
Add a New Command node by clicking on the last node to access the contextual menu and choose “New Command” to open up the Edit form.

Step 2: #
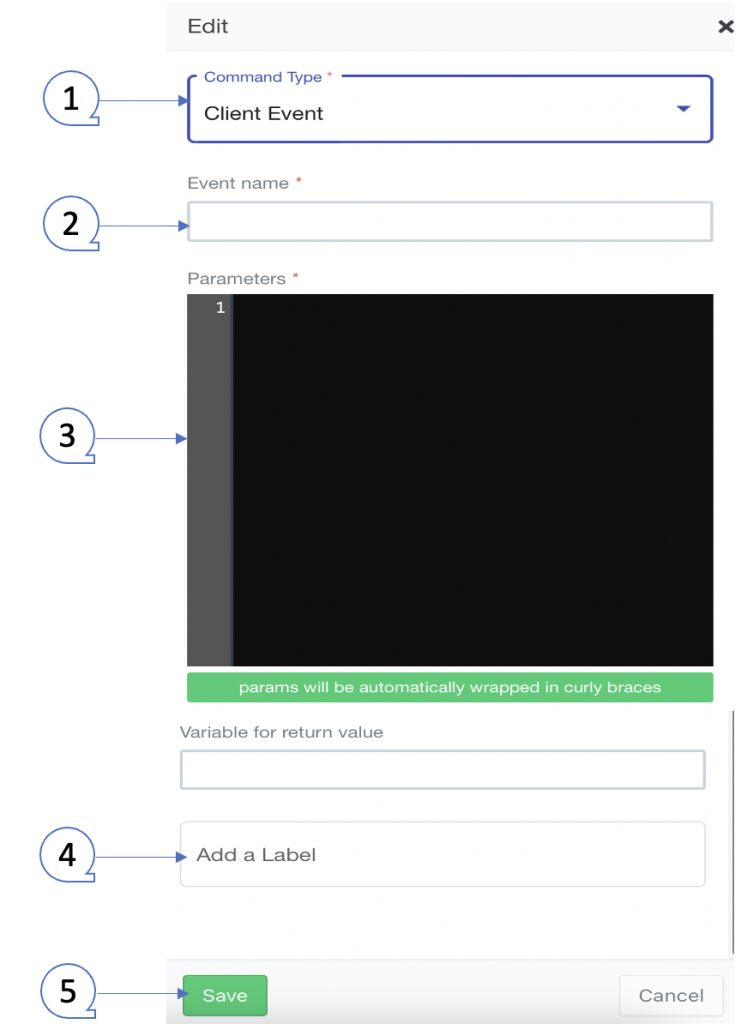
This is the “Edit” form where you can modify the content of this node.
(Q1): Command Type. Choose “Client Event” for this command node.
(Q2): Event Name. Enter a name for the event.
(Q3) Parameters. Enter your parameters in a JSON object encoded string.
For example, the below object with two fields could be used to specify a new size for the client frame:
width:500, height:500
(Q4): Add a Label. Labels are used to reference nodes in various functions of the chat builder.
(Q5): Save.

Example – A possible implementation of the client event handler #
Add this listener on the parent page:
window.addEventListener("message", receiveMessage, false);

function receiveMessage {

    if (e.origin !== 'https://www.querlo.com') return;
    if (e.data.querloMessageType === 'clientEvent' && e.data.command.name === 'NAVIGATE_PAGE') {
      let url = e.data.command.params.url;
     window.location = url;
    }
};
This function:
(1) ensures the message is coming from Querlo.com to prevent exploits.
(2) checks the message is of type ‘clientEvent’.
(3) checks the command name that has been passed. In the case above, we have set up “NAVIGATE_PAGE” as an example. This is the command that we use to cause the embedding client to change to a different URL.
By following the above template, you can trap and distinguish events and their parameters and implement any Javascript logics to consume them.
Edit Nodes #
To edit nodes, click on a node to access the contextual menu and choose “Edit” to open up the Edit form.
Add Nodes #
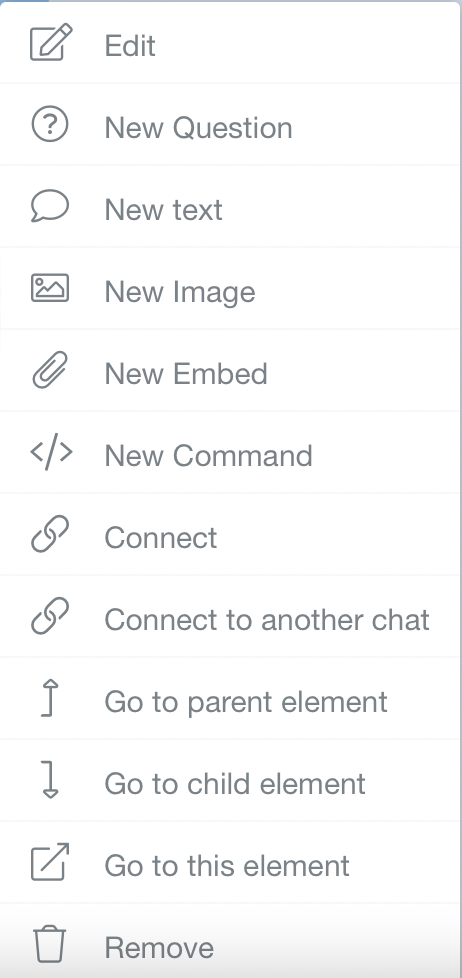
To add nodes, click on the last node to access the contextual menu which contains all the actions that you can perform on the selected node.

The actions include:


