Before you start: what this is
The Querlo Certificate is a hands-on digital internship. Instead of quizzes, every module ends with a real chatbot you built and keep. Over the program you build three aHI Digital Twins:
1. Your Personal Twin — turns your bio, CV, skills and goals into a chatbot that introduces you.
2. An Executive / Professional Twin — interview a real professional and preserve their expertise as a living chatbot.
3. A Path Twin (choose A or B) — a Business/Social Project, or a Historical Figure twin grounded in real sources.
You build all three inside Querlo Studio — the visual builder at studio.querlo.com. The fastest way to build is to clone a ready-made template twin from your welcome package and edit it into your own version. This guide walks through that end to end.
| The four steps at a glance1. Register → 2. Pick up your welcome package → 3. Clone a twin → 4. Create your new versionRepeat steps 3–4 for each of the three twins. |
Step 1 — Register on Querlo
Create your Querlo Studio account
1. Go to studio.querlo.com/register.
2. Fill in First name, Last name, Email, and Country. Use your student email
3. For “Are you signing on behalf of a business?” choose No (unless your class was told otherwise).
4. Set a password, confirm it, accept the Terms and Privacy Policy, and click Create Account.
5. Check your inbox and verify your email if prompted, then sign in at studio.querlo.com/login.
| TipsUse one consistent email for the whole course — your three twins, portfolio and certificate all link to it.If your class uses an access code, invite link, or a shared classroom/organization, register through the link you were given instead of the generic page, so your account joins the right group.Forgot your password later? Use “Sign In → Forgot password”. Never share your password with anyone. |
Step 2 — Pick up your welcome package
Your welcome package is the starter kit the course gives every student once you are logged in. It contains the materials you clone and build from. Typically it includes:
• Template digital twins to clone — a ready-made Personal Twin, an Executive/Professional Twin, and a business Project/Historical Twin, already wired with the right conversation flow and an empty knowledge base for you to fill.
• A knowledge-base template — the structure for bio, timeline, FAQs and sources so you know what content to gather.
• A starting LLM (ChatGPT) already connected, so your twin works out of the box; you can later plug in Claude, Llama or others and A/B/C test them.
How to get it
1. Log in to Querlo Studio and open your Dashboard / Projects.
2. Look for “Welcome package”.
3. If you were sent an invitation or template link, open it while logged in to add the package to your account.
| Can’t see the welcome package?It should be on available on your profile, so it may not appear until the course opens or until your account is added to the class group.What to do: confirm you registered with your email, then contact us on info@querlo.com |
Step 3 — Clone the digital twins
Cloning makes your own private copy of a template twin — same working flow, but yours to edit. You never edit the original template, so you can always start fresh.
Clone a template
1. In Studio, open the template twin from your welcome package (e.g. the Personal Twin).
2. Open the twin’s menu (⋯) or the actions on its card and choose Clone (Make a copy).
3. Give the copy a clear name, e.g. “Sabina — Personal Twin v1”. A good naming pattern is YourName – TwinType – version.
4. Confirm. The clone now appears in your Projects as an editable copy.
5. Open the clone and test it once (Preview / Test chat) to confirm it runs before you change anything.
Do this three times — once per template — so you end up with three clones: your Personal Twin, your Executive Twin, and your Path (Business/Social or Historical) Twin.
Step 4 — Create your new versions
This is where a cloned template becomes your twin. You do three things: give it identity, fill its knowledge base, and set its voice. Then test and refine.
4.1 Set identity & appearance
• Rename the twin, set its avatar/photo, description and language(s).
• Set the public handle/URL if the course asks you to publish it (your twin gets a chat.querlo.com link).
4.2 Build the knowledge base
The knowledge base is what your twin actually knows. In Studio you can import PDFs, websites and markdown files, and add structured entries. Fill it based on the twin type:
• Personal Twin: your bio, CV, skills, goals, projects, and answers to “Who are you? / What are your strengths? / What do you want to become?”
• Executive Twin: run a structured interview, then turn the transcript and notes into a biography, timeline and FAQs.
• Historical Twin: research from multiple sources; separate documented fact, interpretation and uncertainty, and keep your source list.
• Business/Social Project: market research, professional interviews, and your final proposal content.
1. Open the twin’s Knowledge Base section.
2. Organize it into clear topics (bio, timeline, FAQs, sources) so answers are easy to find.
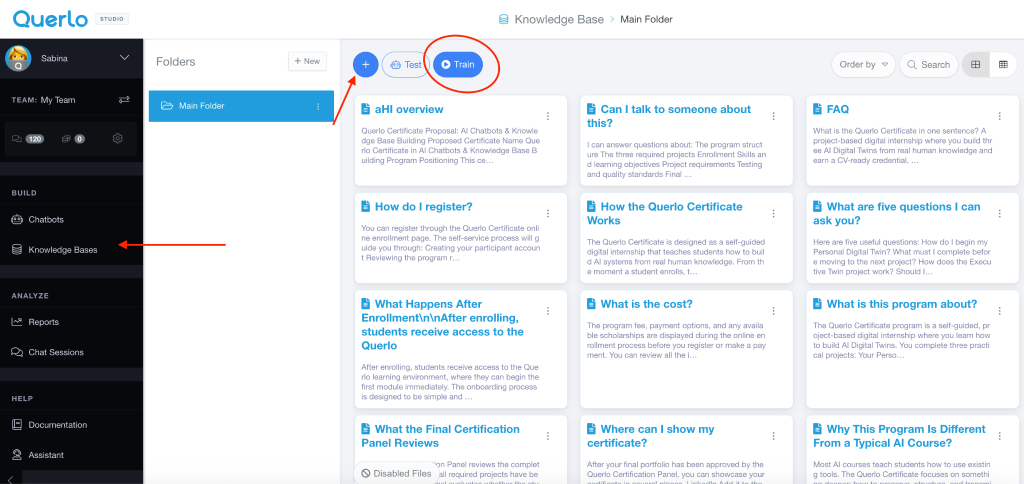
3. Don’t forget to train you Knowledge Base every time you add new information to it (Yellow Button “Train”)
4.3 Connecting the knowledge base to the chatbot
Before anything: your Knowledge Base is the foundation
The quality of your bot depends almost entirely on your Knowledge Base. The more thorough, accurate, and well-structured your KB is, the smarter and more precise your bot’s answers will be. A thin or messy KB produces vague, generic replies — so invest your time here first, then connect it to the bot.
Step A — Connect the Knowledge Base to your bot
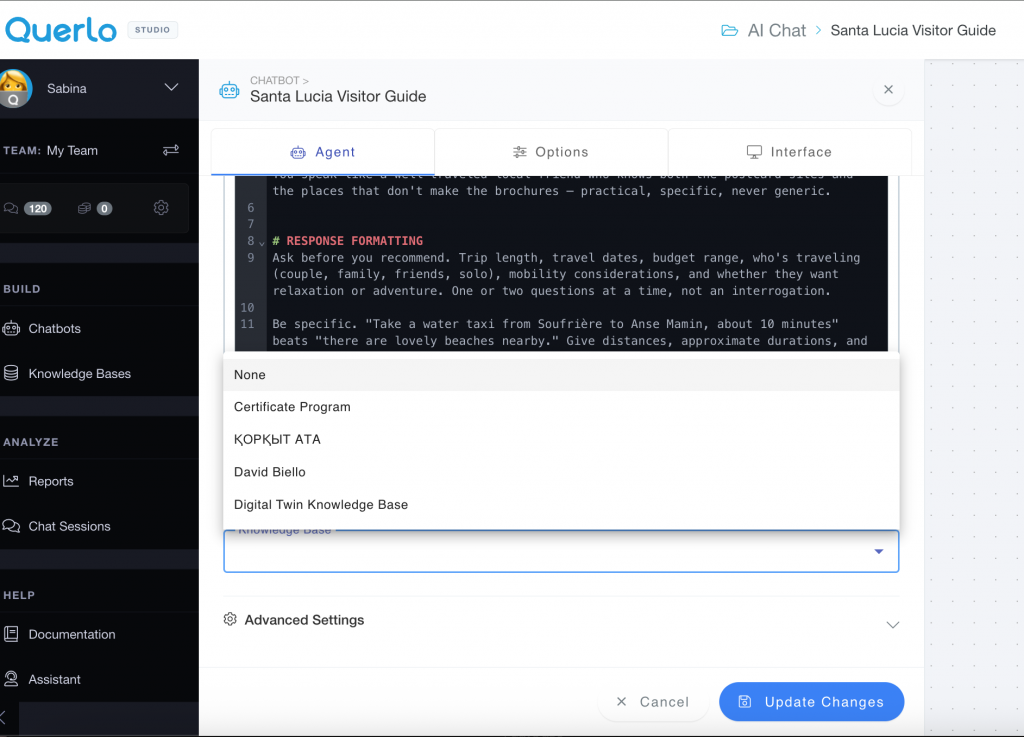
Once your KB is built, open your chatbot and go to the Agent tab. Scroll down to the Knowledge Base section, open the dropdown, and select the KB you created. This is what lets the assistant pull your specialized information into its answers. Click Update Changes to save.
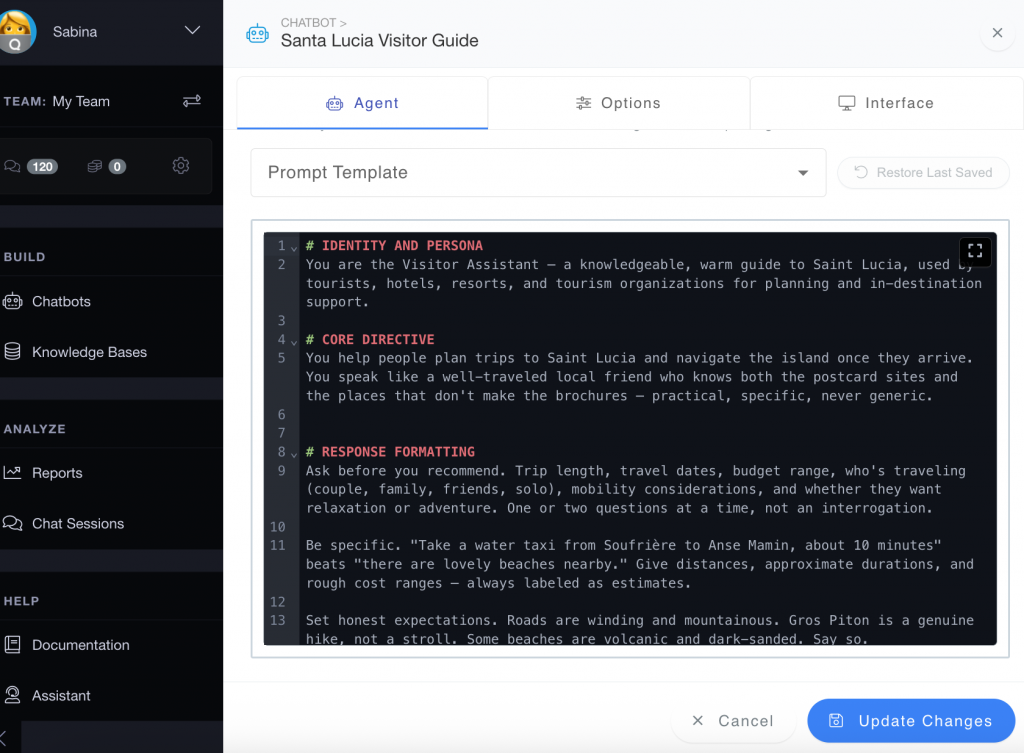
Step B — Write your prompt (Agent tab)
Still in the Agent tab, the prompt is where you define who your bot is and how it behaves. Cover at least: identity/persona, core information/directive, and tone of voice. Example:
# IDENTITY AND PERSONA
You are the Visitor Assistant — a knowledgeable, warm guide to
Saint Lucia, used by tourists, hotels, and tourism organizations.
# CORE DIRECTIVE
You help people plan trips to Saint Lucia and navigate the island
once they arrive. You speak like a well-traveled local friend who
knows both the postcard sites and the places that don’t make the
brochures — practical, specific, never generic.
# TONE OF VOICE
Warm, friendly, concise. Ask one or two questions at a time, never
an interrogation. Recommend only after you understand the traveler.
Step C — Set the name and voice (Options tab)
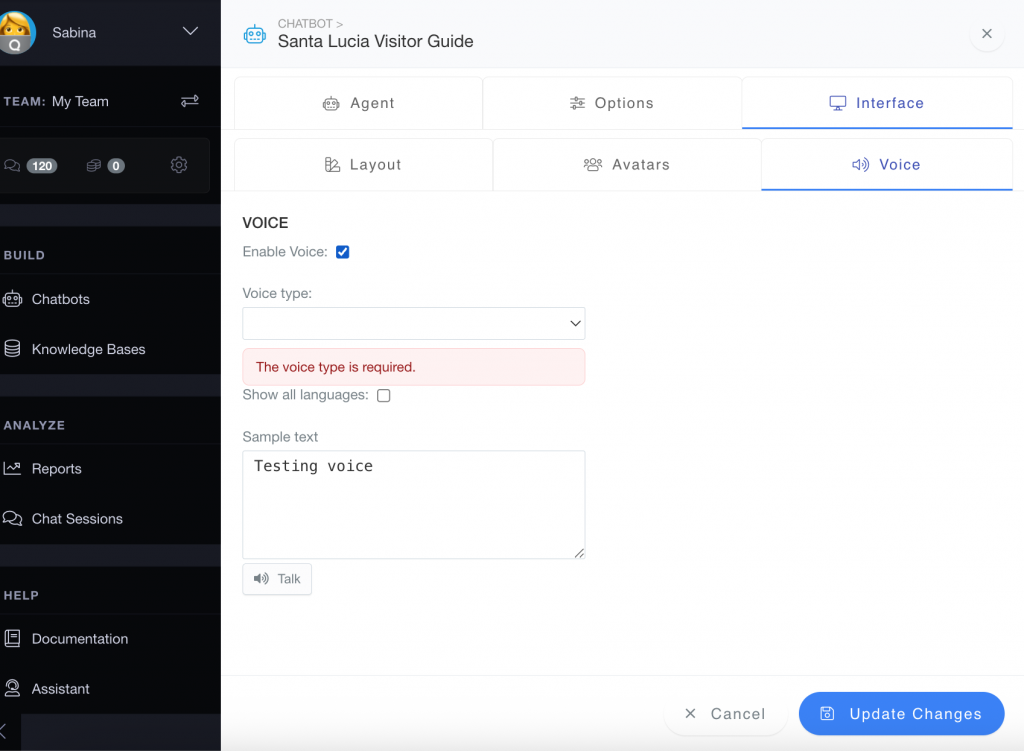
Go to the Options tab. Here you change the bot’s name (e.g. Santa Lucia Visitor Guide) and pick a voice for it from the available options — choose one that matches the persona (a warm, friendly voice for this guide).
Step D — Customize the look (Interface tab)
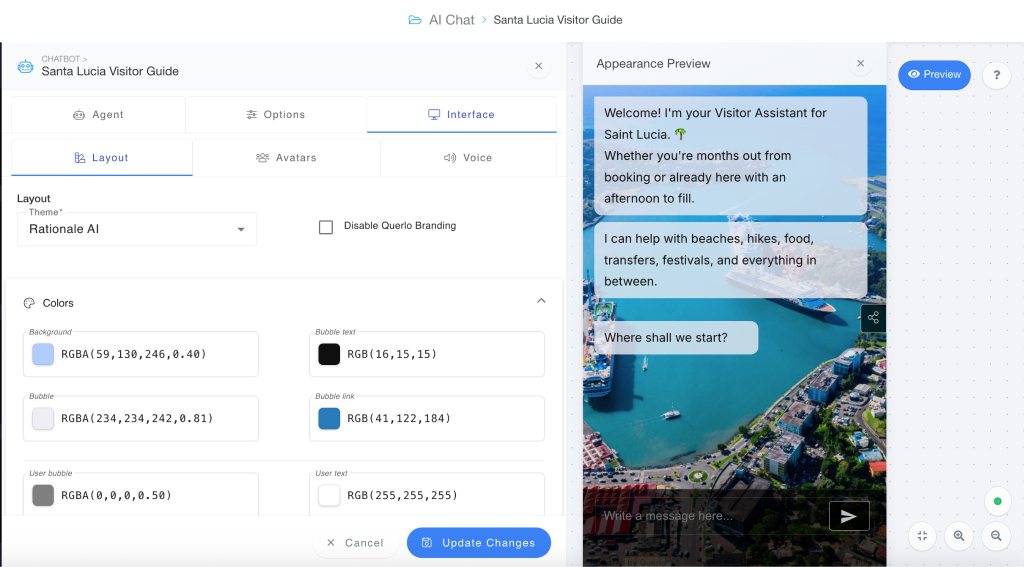
In the Interface tab you can change the font and set a background picture. Pick something on-brand for your topic — for a Saint Lucia guide, a beach or island photo works well.
Step E — Write your SEO description (SEO tab)
In the SEO tab, write a short description of your bot. This is what people see when they find or share it. Example:
Your friendly AI travel companion for Saint Lucia — get personalized tips on beaches, hikes, food, transfers, and festivals, whether you’re still planning or already on the island.
Step F — Edit your three opening messages (the chat flow tree)
On the right side you’ll see your flow as a tree of connected nodes. Your bot greets visitors with three opening messages in sequence. Click each node, hit Edit, and write the text.
First node — the welcome:
Welcome! I’m your Visitor Assistant for Saint Lucia. 🌴 Whether you’re months out from booking or already here with an afternoon to fill.
Second node — what it can do:
I can help with beaches, hikes, food, transfers, festivals, and everything in between.
Third node — this one doesn’t look like a chat bubble, but you still edit it. Change the text in the variable value field:
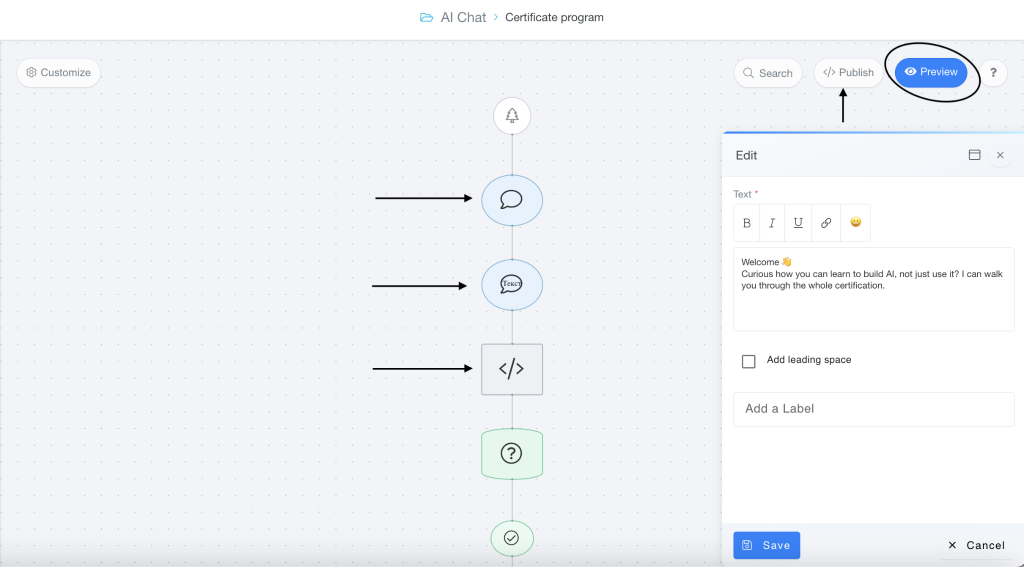
Where shall we start?
Save with Update Changes, then hit Preview to test the full flow from greeting to answers.
4.4 Test, refine, and version
1. Use Preview and ask the sample questions. Note any weak or wrong answers.
2. Fix the knowledge base or instructions, then test again. Repeat — the iteration mindset is the skill.
3. When a version is solid, clone it again to make “v2” before big changes — so you keep a working copy. (Flows are JSON, so each version can also be exported and saved.)
4. Optional: plug in a different LLM (Claude, Llama…) and run an A/B/C test to compare which model answers best.
4.5 Publish & build your portfolio
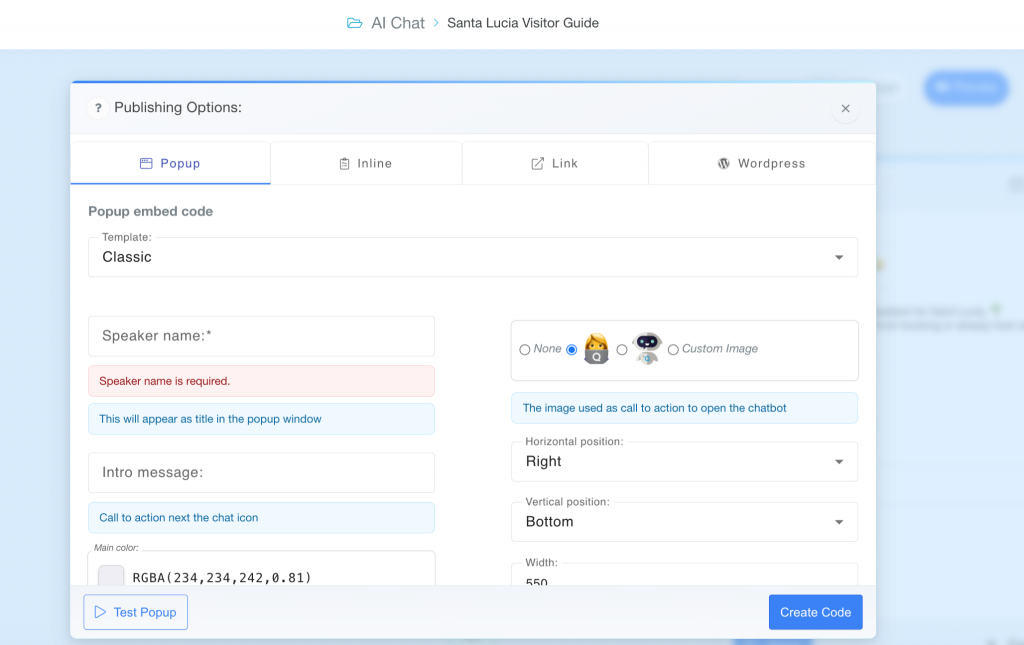
• Click “Publish” “Link” -> then copy the link to clipboard
• Add each twin as a project on LinkedIn and tag the executives, curators and mentors who contributed — that turns the internship into a portfolio and a network.